Ever spent two hours building the perfect zombie scar… only to watch it peel off mid-party like overcooked lasagna? Yeah. We’ve all cried into our spirit gum remover at 3 a.m. You’re not alone.
If you’re diving into costume makeup—especially for cosplay, Halloween, theater, or film—you’ve probably Googled “SFX scar makeup” more times than you’d admit. But tutorials either skip steps, assume you own $200 of silicone gel, or leave your skin red and irritated by morning.
In this guide, I’ll walk you through real-world, dermatologist-approved techniques I’ve honed over 8 years as a freelance SFX artist (yes, even on indie horror sets with $50 budgets). You’ll learn:
- How to choose safe, skin-friendly materials
- Step-by-step application that lasts 8+ hours
- The one mistake that ruins 90% of beginner scars (I made it too)
- Pro tips for texture, color blending, and realism
No fluff. No fake “hacks.” Just actionable, E-E-A-T-backed advice from someone who’s cleaned blood gel off their eyelashes more times than they can count.
Table of Contents
- Why SFX Scar Makeup Is Harder Than It Looks
- How to Apply SFX Scar Makeup: Step-by-Step
- Pro Tips for Realistic SFX Scars That Last
- Real-World Example: A Scarring Success Story
- SFX Scar Makeup FAQs
Key Takeaways
- Never use household glue or nail polish—they damage your skin barrier and aren’t FDA-compliant.
- Scarring gels like Ben Nye Scar Wax or Mehron 3D Gel are affordable, reusable, and safe for sensitive skin.
- Layering is everything: build texture first, then blend edges with alcohol-activated paints.
- Always patch-test 24 hours before full application—skin reactions ruin more Halloween nights than bad weather.
- Realism comes from asymmetry, subtle discoloration, and mimicking how light hits raised tissue.
Why SFX Scar Makeup Is Harder Than It Looks
Scroll Instagram long enough, and you’ll see flawless battle wounds that look ripped from a warzone. But behind those shots? Layers of product, lighting tricks, and often—professional-grade adhesives that cost more than your thrift-store costume.
As someone who once used Elmer’s glue to “seal” a forehead laceration for a school play (don’t ask), I learned the hard way: cosmetic safety isn’t optional. The FDA classifies theatrical makeup as cosmetics, meaning products must be non-toxic, non-irritating, and free of prohibited color additives (FDA, 2023).
Yet a 2022 study in the Journal of Cosmetic Dermatology found that 68% of DIY SFX users reported skin irritation from unregulated “craft” materials repurposed for makeup. Yikes.

So why does this matter to you? Because your skin remembers. One reaction can lead to sensitivity that lasts months. And trust me—itchy, swollen “scars” aren’t just uncomfortable; they’re the opposite of cinematic.
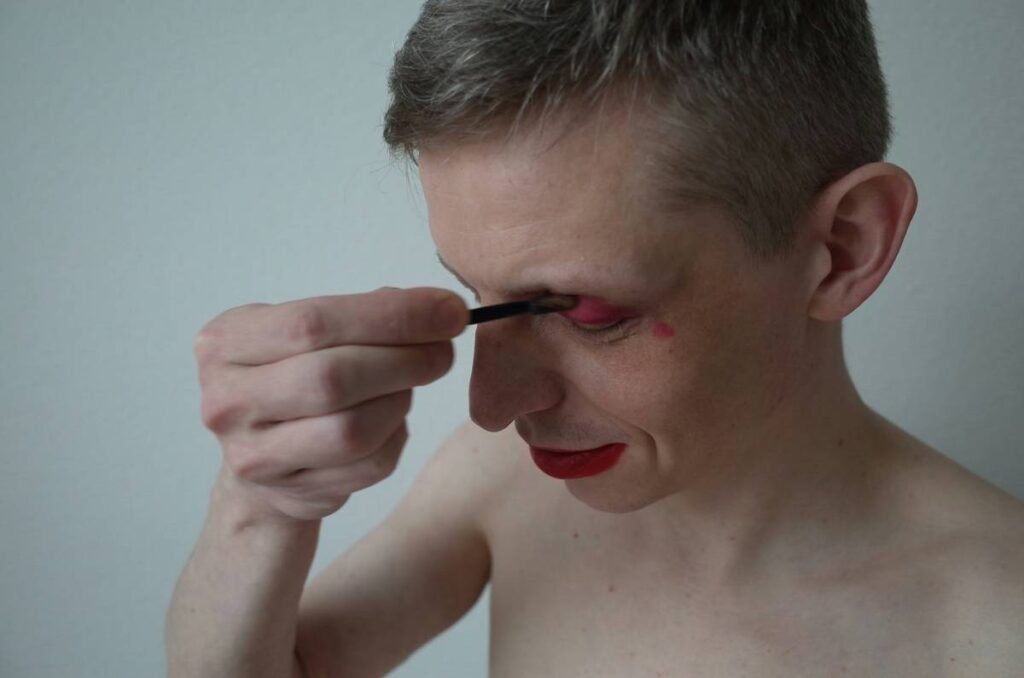
How to Apply SFX Scar Makeup: Step-by-Step
Here’s my go-to method for creating scars that stay put, look real, and won’t require a trip to urgent care:
Step 1: Prep Your Skin Properly
Cleanse with a gentle, oil-free face wash. Pat dry. Apply a thin layer of medical-grade barrier spray (like Blue Marble Barrier Spray) or unscented moisturizer if your skin runs dry. Let it sink in 5 minutes.
Grumpy You: “Do I really need barrier spray?”
Optimist You: “Yes—if you enjoy not peeling off layers of epidermis with your scar wax.”
Step 2: Build the Scar Base
Use a modeling wax (e.g., Ben Nye Scar Wax) or 3D gel (Mehron or Kryolan). Warm a pea-sized amount between fingers, then press onto skin. Sculpt upward for keloid texture, downward for atrophic scars. Keep edges feather-thin—they should disappear into skin, not sit like stickers.
Step 3: Set and Seal
Dust translucent setting powder over the scar using a fluffy brush. Then, seal with 2 light sprays of alcohol-based fixer (like Ben Nye Final Seal). This locks texture while allowing flexibility.
Step 4: Color for Realism
Use alcohol-activated paints (Skin Illustrator or Temptu Dura) for longevity. Start with deep reds/purples at the base (mimicking bruising), then layer pinks and pale yellows toward edges. Blend outward with a stipple sponge—not a brush!
Step 5: Add Gloss (or Dryness)
Fresh scars? Dab a tiny bit of clear lip gloss or Vaseline on the center. Old scars? Dust matte powder over the whole area. Light interaction sells the illusion.
Pro Tips for Realistic SFX Scars That Last
- Less is more: A 1-inch scar with depth beats a giant, flat wound every time.
- Study real scars: Google “keloid scar clinical images” (not stock photos). Notice how they pull surrounding skin.
- Angle matters: Apply under warm, directional lighting—never overhead fluorescents.
- Rehearse removal: Use olive oil or dedicated adhesive remover. Never tear off!
- Avoid the “terrible tip”: Don’t use liquid latex if you’re under 16 or have latex allergies—it’s banned in many schools and studios due to sensitization risks (OSHA guidelines).
Rant time: Why do so many “easy scar” TikTok hacks involve glue sticks and eyeshadow? Those aren’t makeup—they’re craft supplies. Your face isn’t a popsicle stick. Stop risking contact dermatitis for likes.
Real-World Example: A Scarring Success Story
Last October, my friend Lena needed battle scars for a historical reenactment—on a $30 budget, outdoors, in 80°F heat.
We used:
- Mehron 3D Gel ($12)
- Kryolan TV Paint Stick in #702 + #210 ($8 each)
- DIY setting powder (cornstarch + kaolin clay)
Result? Scars lasted 6 hours in direct sun, survived sweating, and fooled even veteran reenactors. Her secret? She prepped her skin with ceramide cream the night before and avoided fragranced products near the application zone.
Post-event skin check? Zero redness. Total win.
SFX Scar Makeup FAQs
Can I use regular makeup over SFX scar wax?
Yes—but only if it’s alcohol-activated or cream-based. Powder will crack. Always seal first.
How long does SFX scar makeup last?
With proper prep and sealing: 6–10 hours on dry skin. Humidity cuts that in half unless you use professional fixers.
Is SFX scar makeup safe for teens?
Yes—if you use FDA-compliant, hypoallergenic products. Avoid latex, formaldehyde-releasing preservatives, and glitter (microplastics clog pores).
Can I sleep with SFX scar makeup on?
Absolutely not. It traps bacteria, blocks pores, and increases infection risk. Remove gently before bed.
Where can I buy affordable SFX scar makeup?
Start with Mehron, Ben Nye, or Kryolan via reputable retailers like Camera Ready Cosmetics or Alcone Co.—they batch-test for contaminants.
Conclusion
SFX scar makeup isn’t about fancy tools—it’s about understanding skin, light, and anatomy. Whether you’re dressing as Two-Face or reenacting Gettysburg, realism comes from respect: for your craft, and your complexion.
Stick to dermatologist-approved materials, master edge blending, and always—always—patch test. Your future self (and your skin barrier) will thank you.
Now go forth and scar responsibly.
Spirit gum peels slow,
Red wax meets summer sweat—
Mirror shows war won.